How to Change Oil in Your Car?
Changing the oil in your car is a crucial maintenance task that every car owner should know how to do. By keeping up with regular oil changes, you can prolong the life of your engine and ensure that your vehicle runs smoothly. If you’re new to car maintenance or simply looking for a refresher, this guide will walk you through the steps of changing the oil in your car.
### Gather Your Supplies
Before you begin the oil change process, make sure you have all the necessary supplies on hand. You will need:
– A new oil filter
– The correct type and amount of oil for your vehicle
– A wrench or socket set
– An oil filter wrench
– A drain pan
– A funnel
– Safety gloves and goggles
### Prepare Your Vehicle
Start by parking your car on a level surface and letting the engine cool down for a few minutes. Then, pop the hood and locate the oil dipstick and oil filler cap. This will help to ensure proper oil drainage during the change.
### Drain the Old Oil
Place the drain pan beneath the oil drain plug, which is typically located on the bottom of the engine. Use your wrench to loosen the drain plug and carefully remove it. Allow the old oil to drain completely into the pan. While the oil is draining, locate and remove the old oil filter using an oil filter wrench.
### Replace the Oil Filter
Before installing the new oil filter, make sure to lubricate the rubber gasket with fresh oil. This will help create a proper seal and prevent leaks. Once the gasket is lubricated, screw the new oil filter into place by hand. Make sure it is securely tightened but be careful not to over-tighten it.
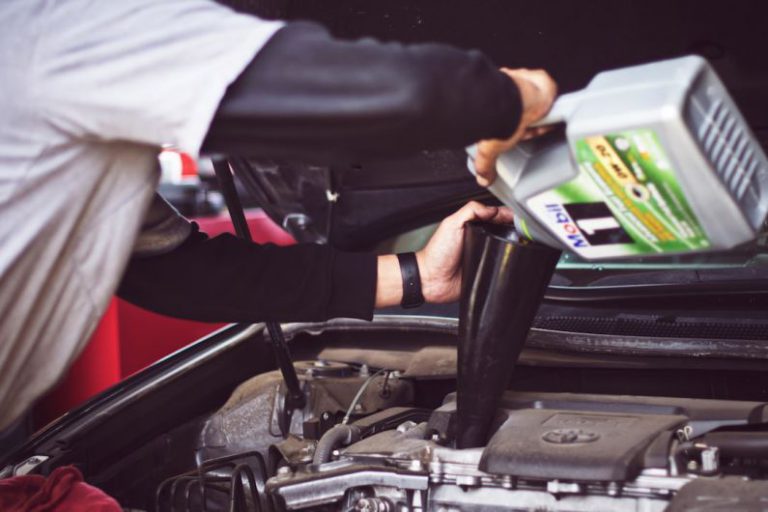
### Refill with Fresh Oil
After the old oil has finished draining, reinstall the drain plug and tighten it securely. Next, locate the oil filler cap and remove it. Insert the funnel into the filler hole and begin pouring in the new oil. Refer to your vehicle’s manual to determine the correct amount of oil needed. Once you have added the appropriate amount, replace the oil filler cap.
### Check Oil Level and Quality
After completing the oil change, start your car and let it run for a few minutes. This will help circulate the new oil throughout the engine. Turn off the engine and wait a few minutes for the oil to settle. Then, use the oil dipstick to check the oil level. Ensure that the level falls within the recommended range and that the oil appears clean and at the correct consistency.
### Dispose of Old Oil Properly
Once you have completed the oil change, it’s essential to dispose of the old oil responsibly. Many auto parts stores and recycling centers accept used oil for proper disposal. Never pour old oil down the drain or onto the ground, as it can be harmful to the environment.
### Maintain a Regular Oil Change Schedule
Regular oil changes are vital to the health of your vehicle’s engine. It is recommended to change your oil every 5,000 to 7,500 miles, depending on your driving habits and the type of oil you use. By staying on top of your oil change schedule, you can help prevent costly engine repairs down the line.
### In Summary
Changing the oil in your car is a straightforward task that can be done at home with the right tools and knowledge. By following these steps and maintaining a regular oil change schedule, you can keep your vehicle running smoothly and efficiently for years to come. Remember to always consult your vehicle’s manual for specific instructions and guidelines related to oil changes.